Thursday, December 16, 2010

Paper Piecing bitty bowl!

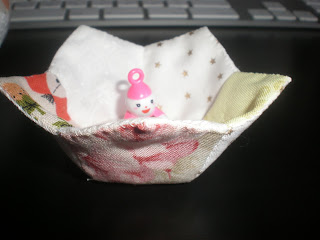
The little tiny bowl was a lot of fun to make, made from English paper pieced hexagons, 1/2inch diameter each. I thought with it being so small it'd stitch up pretty quick, but being so small, it was trickier than I expected. I got the idea from here, and finally found pentagon pieces online from the States here. The nice thing with this is it uses scraps, which I love! This bowl was my test run, and it turned out cute, but i didn't put any interfacing in it, so it's very flopsy.


So, my next try I made the bowl using 2" sized pentagons and I ironed interfacing inside one layer and it turned out much sturdier, able to be used to hold candies or small things. In the future I'll iron interfacing to both sides for a good sturdy bowl.


I finished the bowl off with a buttonhole stitch around the edges for a sort of homemade/country style look.


And finally, when starting Christmas ornaments this year, I wanted to make little snowmen out of hexagon balls, but after making the first 2, I realized it was going to take ages to make one, so had to revamp my plan.

Wednesday, December 8, 2010

Bits for Boys

Made for some of the littlest boys in my life, Jordan and his friend Yuji. Pencil cases from character fabric that they love. Pokemon for Yuji, Nintendo for Jordan. Now to finish Peanuts for Jay and Little Miss for Julia!

Pokemon front

The insides are lined as well, with a nice check/plaid I found.


Back of Pokemon


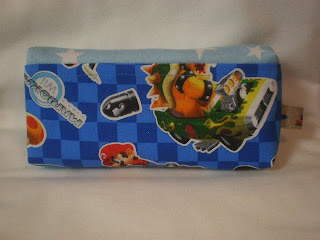
Front of Nintendo's Mario Kart...I didn't pay attention though to the image direction, and so Mario's Kart is upside down.


Back of Nintendo, all images are going the right way on the back :)


Saturday, December 4, 2010

BABY Bits

Decided to attempt some baby things for some of the new babies in my life...NOT MINE! Don't worry everyone, for friends and family!

Found this adorable caterpillar pattern in a Japanese quilting magazine, and had to make it. Don't know how reliable it is as a toy, I did try to make it strong enough to endure playing, but I think I'd leave it as a mobile or decor.


Yoshi decided to help me model out one of the bibs I put together, easy and fun to make.


The pile of baby boy bibs I made, I have a few leftover, am thinking to list them on Etsy for sale.


Small fabric basket, big enough to hold some cotton, diaper cream and little odds and ends that need organizing.


The bottom of the basket, a Japanese linen-type fabric with hand embroidery embellishing.


Another free pattern I found online for a diaper clutch, throw a few diapers and pocket wipes into it and it's ready to toss in your purse for those quick trips out the door, walks and times when you don't really need a full-on diaper bag.

You can't see it too clearly, but the top has a hand-embroidered feather stitch using scraps of embroidery thread left over from years of cros-stitch projects.


I love playing with colors, that caterpillar is made primarily from scraps with lots of color.


Julia has asked me for a mini-version of this to hang on her school bag, as soon as I have time, I want to attempt it.


Close up of the bib. I did all machine quilting on it, using a multi-color blue thread for the top. But the little hexagon embellishment was hand-sewn.


Thursday, November 25, 2010

Bitty Gifts

Made these up for my sister a few weeks ago and have been waiting for her to get the package before I posted the pics! Was fun doing these, the snowman doorhanger pattern can be found here, and the little pouchy thing was from a book I purchased at Amazon.


I told my sister that all in all, if I were to be paid for the hours put into those, that snowman door hanger would cost about $400, damn expensive! LOL! It has some applique in it, of which I'm not that good at, and I had to pull out a few parts to redo. Other than that, it was easy enough. The little pouch is a Japanese lineny sort of fabric, really popular in Japan now, with a babushka (??) Russian doll design on it, I love that fabric and couldn't wait to make something out of it! In terms of time it only took about 20 minutes to put together, really easy, and, very convenient for your purse!

Friday, November 12, 2010

Mee A Bee


Meet my new foreign housewife friend in Japan who makes these adorable little bags out of Japanese fabrics. And lucky for me, she lives close enough for me to drop by on my way home from work sometimes, for a cuppa or comparing sewing projects, or best of all, hashing out the problems involved with raising your children in a foreign culture and school system.


you can't scare me!

A plaque contributed to my sewing room by Janina...

BIRTHDAYS!

Many many birthdays surround my life, and inevitably I am often late with presents. I made this cushion cover for Janina's best friend Emma, who turned 17. It was fun to make and completely different from anything I've done so far. I didn't have a pattern, but saw the idea somewhere online, and decided to try making it. I could tweak the pattern a bit, but overall I think it turned out decent enough!


Sunday, November 7, 2010

Free patterns

There are SO MANY wonderful and free patterns online, I've rarely bought a pattern myself. Whenever I want to make something, I type it into the search and see what comes up, and more often than not, there is a pattern online for it. Slowly I'll be adding links to those lovely free pattern in the link list on the side of the blog. My most recent creation from a free pattern is from the Pink Penguin blog, a fabric basket tutorial which I LOVE making, it's pretty quick, versatile and the end result is nice enough to give as a present!

My Motto

One of many mottos!! Janina gave me this sign for my wall, I find it very true!


Tuesday, November 2, 2010

FABRICS!!

Picked up this great pile of fabric at ABC Craft downtown Tennoji. Pretty reasonably priced and lots of selection of not just fabric, but beads, yarn, tole painting, traditional Japanese crafts and more! Am not too sure what I'm going to do with the fabrics yet... but I know from experience that it never hurts to have too much stash!

Tissue Box covers...for you Missy!

I promised my cousin a tissue box cover months ago! She even bought the fabric for it! And, sadly, it's still sitting in my 'projects to be done' pile! The problem is the shape of the American tissue box, which is a cube, vs. the Japanese tissue box which is a slim rectangle. I find it so much easier to make covers for the Japanese boxes, but the American one is much more fussy, and until I can get the pattern down to where I really like it, I am hesitant to cut into my cousins lovely fabric and possibly mess it up! Here are 2 covers I made this weekend, which I think turned out pretty nice, and I'm almost confident to start working on Missy's cover!


Saturday, October 30, 2010

Scrappies!

I love scraps of material, the 'bits' of quilts leftover. When I'm out of projects to work on (which is never!), I pull out scraps and sew them together. Here's a few leftovers sewn together and waiting for their chance to be made into something special....and while they wait, they hang on my walls to add a bit of color to the sewing room.


This one is unique in that it is ALL handsewn, in the true Japanese style of quilting (I swear, if I followed true Japanese quilting, I'd never pick up a project, the thought of making a queen-size quilt ALL BY HAND!! Not even a thought...


The bits in this one come from a Moda line, and were leftover from a tote-bag I made for my little sister.


Quilting is not my only craze! I cross-stitch whenever I have to be away from the machine...on the train to work, watching TV, sitting in a restaurant and having coffee...I started this project in June, 2010, finished in October. Fabric is Aida 18ct, which is harder to work on, but makes details so much more fine.

Not sure where the bits from this project came from, I think several leftovers thrown into the mix. The diamonds are about 1"x1" total, so the project is small.

These will eventually be made into placemats, the design came from a wonderful little Japanese hexagon pattern book, which I bought on Amazon.co.jp for less than $5, and found selling on Ebay for over $15! Hmmm.... Each placemat has a color theme, I made a blue one which went as a gift to my step-daughter. I plan on a purple, orange, another blue, and maybe a yellow one.


Thursday, October 21, 2010

Tote on Request


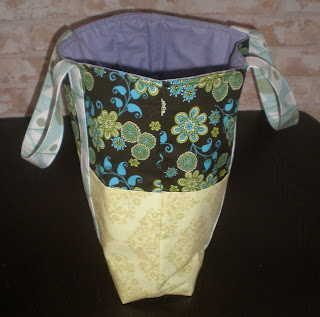
Finished up this requested tote bag for my step-mother. I love the fabrics, the darker one is actually a dark chocolate brown with bright blues and greens in it, a bit of yellow, then a soft but bright yellow for the bottom half, which are actually outer pockets, I chose an Amy Butler pale blue with white and greenish grey leaves for the handles. All in all I'm really happy with how it turned out!

For the inside lining I used some lavender fabric and made a couple of pockets with leftover fabric from the bag exterior.


Here is a closer shot of the main fabrics I used, plus my little handmade tag on the edge there!


And finally a side view of the bag. It's large enough to hold textbooks and a few other things too.

The original pattern is a freebie I found online at All People Quilt.com. The bag was originally smaller, but as the bag was needed for carrying teaching books, I enlarged it by about 4" in each direction except the bottom. Find the original here: Pick-A-Pocket Purse

Sunday, October 17, 2010

Project! 9-patch cushion cover

A small and quick project I did the other day, using a nice little bunch of leftover fabric from my friend Patti, with a Halloween/fall theme. It's a 9-patch in the center, with some borders added. The cover ended up being a bit too small for the cushion, but with some squeezing I managed to get it in.

Here is the back, I opted for snap closures. Originally I wanted a zipper, but none of my zippers were the right size and I couldn't wait till I got into Osaka to buy a zipper...so, I modified my plan :)

Thursday, October 14, 2010

Tutorial! Zippered pouch

My first tutorial! Ever! My daughter's friend requested a small makeup pouch, so I designed this for her, it's the perfect size to fit in your purse, carry feminine products, makeup, ipod...and it's CUTE!! Most of all, it was pretty easy to make, less than an hour from start to finish, including taking the pictures!


1. Cut out pieces...you will need:

* 1 zipper (mine was about 6.5" or 7. Longer is OK, you can trim it, shorter is not so good)
* 1 applique embellishment (or not, I like the color it added, mine was made from an English paper piecing hexagon)
* 2 pieces for outer fabric
--1 piece for top of pouch: 4.5"x 6.5"
--1 piece for bottom of pouch: 11.5"x6.5"
1 piece of cloth for lining: 15.5"x6.5"
(optional) 1 piece of batting or felt or flannel for a lining, gives the pouch some stability, but can be left out. Or, you can iron on some fusible web to the back of the lining, that'd work too!


Iron one short end of your main fabrics, and both ends of the lining fabric at 1/4". I used flannel for a support rather than batting, and cut it 1/4" shorter than the lining on each side. Iron the lining over the batting.
Pin the zipper to your bottom outer fabric and lining fabric on the other side.


Sew together (should have 3 layers) using your zipper foot (I have a lovely Bernina that my Mom gave me last year!)

Pin the upper outside fabric to the other side of the zipper and (here's the tricky part) pin the lining fabric to the opposite side of the zipper.


Sew in place.

At this point I added the blue hexagon about 1.5" under the zipper and in from the edge. I used an applique stitch to do it.

Sew the two outer fabric pieces with right sides together.

Iron and sew along the seam where your two outer fabrics meet. Another option is to hand embroider a straight stitch right there, which gives it a nice touch.

Lay the pouch down and adjust where you want the opening to be. I put it around 1.5" from the top. I also like to add a little homemade tag to the side, sort of cute.

If you're putting a tag on, pin it on, right side of tag facing right side of fabric. I forgot to take a picture, but at this point, turn the entire bag inside out, and pin the open sides together, then sew them down, about 1/4" from the edge. Make sure to leave the zip open so you can turn it back around when done!

I trimmed the edges down a bit and then zig-zagged.

So, now to make the box corners. I like to put a pin along the center of the bottom of the project to make it easier to fold it down.
Fold the fabric down with the center of the zig-zag edge meeting the center of the bottom of your pouch, pin to secure.

Lay it out flat, and measure about 1" from the bottom corner, draw a line.


Sew along the line (this will make about a 2" bottom, but if you want a slimmer bag, measure the corners at about 3/4".)

Cut off the corners and zig-zag the open edge.

Turn it right-side out and tah-dah! There you are!


Since this was my first tutorial, i know it's gotta be confusing in some parts and probably not friendly to a newbie sewer! Write me if you have a question so I can work on clarifying my messy explanation!