Wrapped leather bracelets, those these just have one wrap in them. The leather cord I got was sort of thick, so future 2 or 3 wrap bracelets will be made with a thinner leather cord. I love the beads, some genuine stones
onyx
hematite
amethyst
bamboo coral
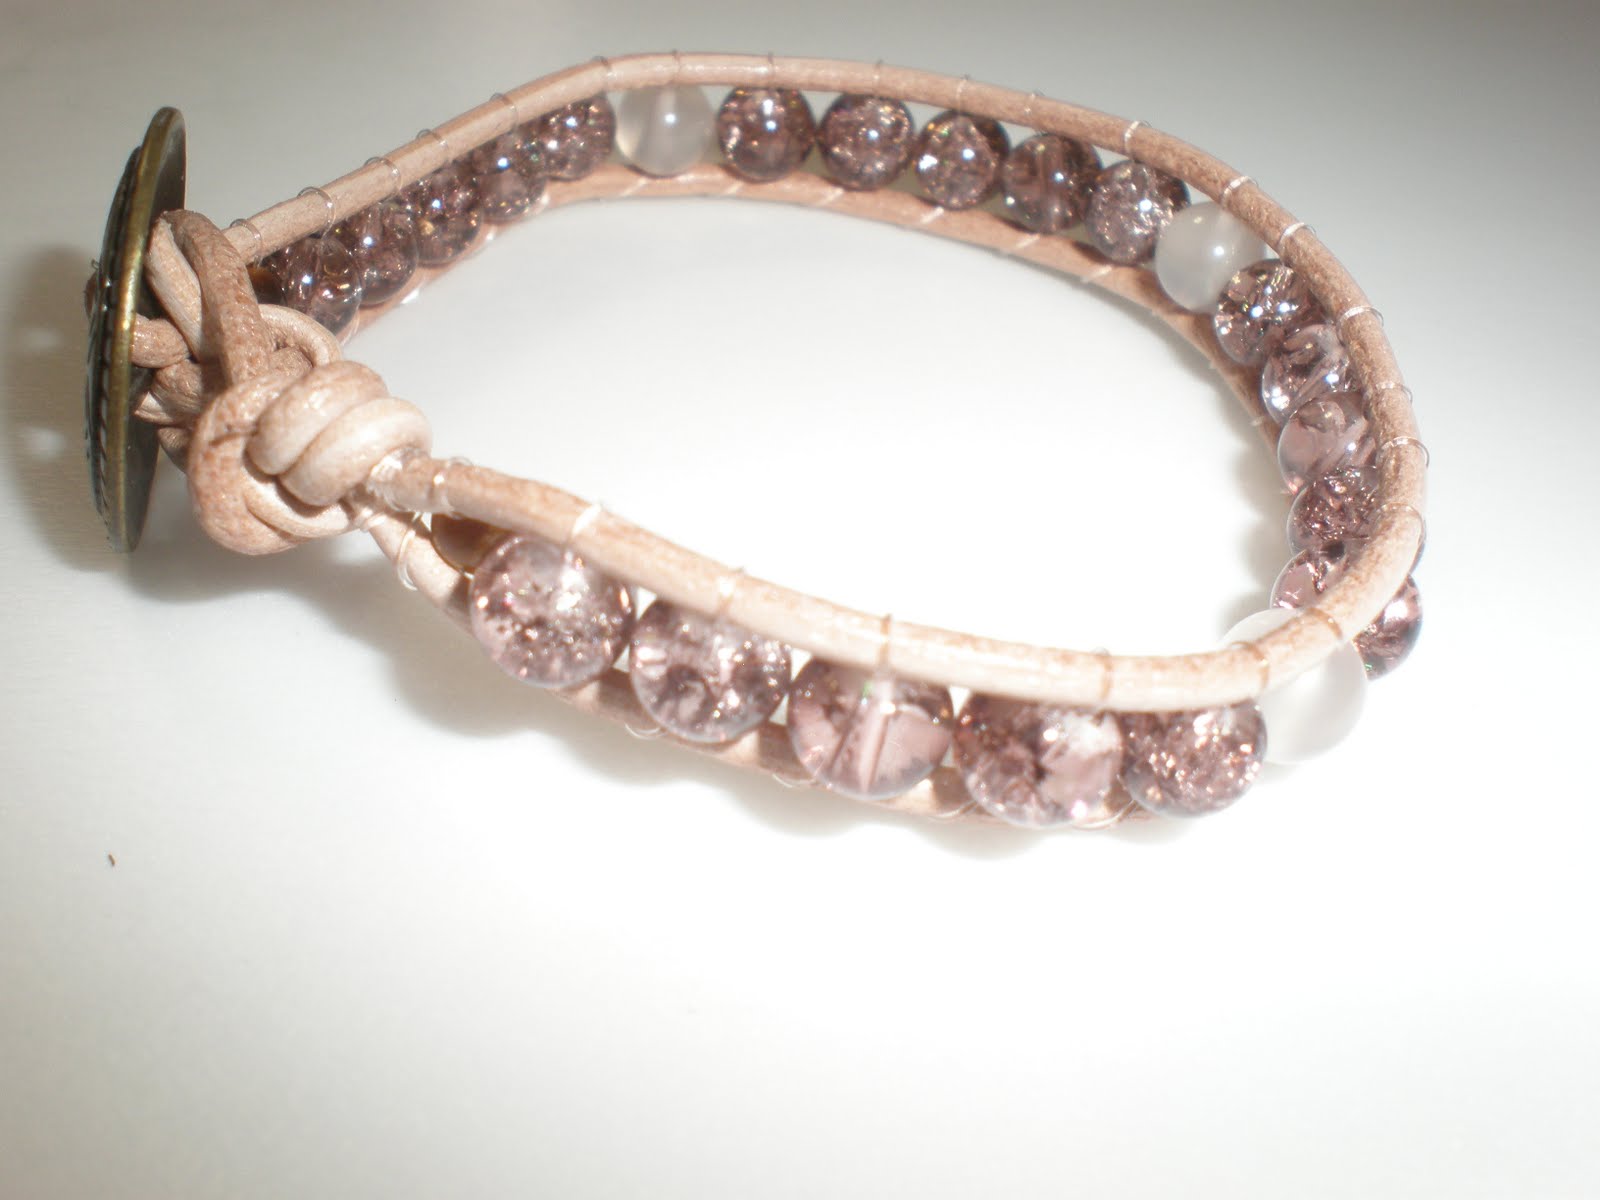
rose quartz
and purple/brown cracked glass
I think my favorite bead size is the 4mm (smaller) vs. the 6mm. 6mm would work on a single wrap but might be too overwhelming for a double wrap. I also prefer the dark leather cord to the lighter beige cord, I think cause my skin tone is lighter, but I like the flower/shell button clasp.
More bracelets will be coming soon! (waiting for leather cord to arrive :) )
The black one is misshapen cause I had to remake it a few times, it is now a gift to my husband .
...in a pile...
6mm cracked glass and rose quartz with brass button clasp

4mm onyx with some hematite and bamboo coral, flower/shell clasp

4mm hematite with a touch of onyx and amethyst, wood button clasp